
There is much more to colouring b&w images than toners alone. In particular, there is the Colorvir system, which was invented by Pierre Jaffeux as a means of extending creative options beyond the existing boundaries. In fact, Jaffeux's methods were not entirely new, but instead built on and extended combinations of colouring systems that had been known for some time, such as acidic and alkaline dyes and direct sulphur toning. His great achievement, however, lies in having brought all these elements together in a single cross-compatible kit, something that has, without doubt, opened up new possibilities for colouring b&w prints. Even better, the Colorvir kit, which is available in the UK through Jessop stores, is exceptionally well-priced.
Colorvir processes are capable of giving outlandish effects, but also capable of giving soft colours and gentle gradations. Results produced depend on the way in which the kit is used. Many people assume that Colorvir means only the subtlety and finesse of a heavy metal concert. Nothing could be further from the truth.
The Colorvir kit contains twelve bottles of liquids and one pack of common salt. It also includes a brief instruction booklet and a 5ml measuring cylinder. The whole lot retails at a penny under �25 and is sufficient to provide seemingly endless hours of experimentation. Indeed, I would say that you are likely to spend many hours producing extra prints in the darkroom before you are anywhere near exhausting the kit. Should some bottles run down before others, they can be replaced in small sets. These same sets define the liquids' actions; Dyes, Polychromes,Toners and Special Effects. The first two are actually both dyes of different sorts. The named Dyes work on dark areas, which must first be acted on using one of the two Toner solutions (blue or yellow - the latter being the best, according to the instruction book). The Polychromes work on the light areas. Again, the print must first be treated with yellow toner, only in this case one of two Special Effects liquids must be added to the toner.
Already, this is starting to sound rather complicated, but the Colorvir system is actually very easy to use, thanks mainly to the fact that everything (except the salt) is provided as liquid concentrates that can be measured out according to methods detailed in the booklet. The results obtained are indicated in the instructions, but these are only guides. To find out what can really be achieved, there is no substitute for experimentation - and keeping notes.
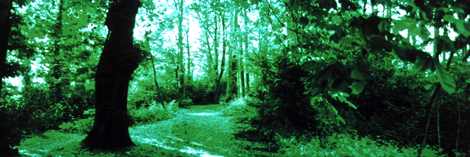
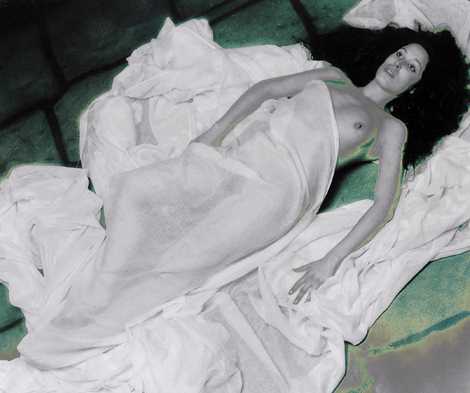
The examples shown here are a b&w print (top) and Agfa Scala transparencies, which reacted similarly to - though a little slower than - the paper images. RC prints are recommended in the instruction book, and proved to be the wiser choice in practice: streaking of colours was a particular problem on FB prints when Polychrome dyes were used.
Of the prints tested, those made on Sterling RC-VC Pro paper seemed to respond best (as I have also found of toning in general). The yellow toner needs to be made up at greater strength when working on film images, but otherwise things are much the same. As a matter of interest, the Colorvir booklet includes specific details for working with films: although this advice was written before the advent of Scala, it still holds good for the new emulsion.
The arm decoration, featured also in last month�s toning report (when gremlins sneaked into the magazine�s production process and made the results difficult to appreciate on the printed page), was given a standard yellow/blue solarisation treatment. This involved solarising in B+C+D, then stabilising in salt, washing and toning in blue (A+C). According to the instruction booklet, "the effect of solarisation is not immediate".
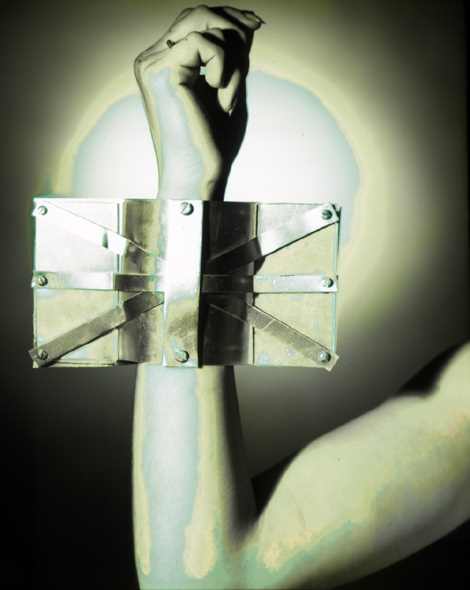
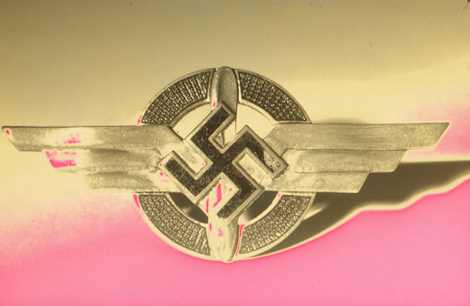
This is only half true, because prints and films do change their appearance in this bath, bleaching slightly and turning yellow. This aside, the effect works as expected. Particularly dramatic is the use of red Polychrome dye instead of toner, when a vivid pink/yellow split effect is produced. It's not a subtle result, but one that does look most eye-catching when used on the right subject (such as the cap-badge image here).
It is worth noting that Polychrome dyes require acetic acid to be added to their working solutions, but that this is not included in the kit. Stop bath (even the type with indicator added) seems to do the trick, though whether this causes any long-term problems is unknown at this stage.
An even more interesting special effect is provide by what the book calls "freezing the grey". This involves using a very dilute solution of Liquid F (about five drops in 500ml of water) before toning, and works to protect the lightest tones of the image so that only the darker tones are coloured by subsequent operations.
I found that by following the standard freeze and blue tone route, then washing, solarising and salt stabilising, a particularly striking electric green could be obtained while still keeping clean whites and light tones. This last point is particularly important because it is far too easy to color everything when using Colorvir: the effects so obtained don't look anything like as good as those that are more selective in their action.
Finally, there are intermediate stages at which prints look interesting, and it is tempting to wash and store them as they are. It is possible that such images will fade or deteriorate, so intermediates should be copied to colour slide film as quickly as possible. It would be a sensible move to copy all final prints too, for Colorvir is not a process that lends itself to exact duplication.
The Colorvir kit is not perfect. As has already been noted, acetic acid is required but not included. There are inconsistencies in the instruction book; most solutions are made up in '500cc' of water using less than '5cc' of concentrate, yet the measuring cylinder is marked in 'ml'. Yes, cc and ml are the same thing, but why use one on the meaure and the other in the book?
Similarly, the salt solution is specified as 50g/l, but the book advises that "proportions are given for 500cc of water": there is a danger that some users will add 50g of salt to half a litre of water. Since the instructions advise against using more concentrated salt solutions, this might cause difficulties in some situations.
The booklet also contradicts itself over the make-up of the solarisation bath. The solarisation instructions say use 2cc of 'B', while the polychrome dye instructions say use 2.5cc.
As it happens, none of these is a serious problem. I had never used the Colorvir kit before testing it, and still experienced no major problems. The worst problem that did arise was a tendency to go too far: having got a good result, I couldn�t resist seeing what happened when other things were done afterwards. Sometimes this worked and sometimes it didn't. But this is in the nature of all creative processes - and indeed it is at the heart of their appeal. As such, the Colorvir kit is to be thoroughly recommended.
E-mail the author Jon Tarrant
Return to August contents