Chrome Brew - making your own E-6 from raw chemicals

by Derek Watkins

The Kodak Ektachrome E-6 process has been with us for around twenty years now - which in its own way says that Kodak really did get it right. Not only did E-6 quickly become the standard against which all other processes were judged, it also took over as the universal process for colour reversal films.

One advantage of the E-6 process is that it is relatively easy to handle in the home darkroom. Indeed, you don't even need a darkroom to be able to process your own reversal films.

COSTS

The only real snag is the high cost of the official Kodak E-6 processing kit. The 600ml Hobby-Pac, for example, costs about £25 (pounds UK) and processes up to six 36 exposure 35mm films or the equivalent. This works out at £4.17 a film, which is not much less than my local professional lab charges.

You can cut the cost per film by purchasing the larger 3.8 litre professional kit for a round £50. This kit will process up to about forty 36 exposure 35mm films. So you can see how this can bring the cost down considerably - to approximately £1.25 a film.

However, if you only need to process a few films a week you'll end up throwing the solutions away before they've reached the end of their useful life, and the cost per film goes up again.

Having said that, there are many less expensive small kits on the market, such as those made by Tetenal, Fotospeed, Paterson and Photocolor. All of these reduce the cost per film quite considerably - to about £2.15 in the case of the 500ml Tetenal UK-6 processing kit.

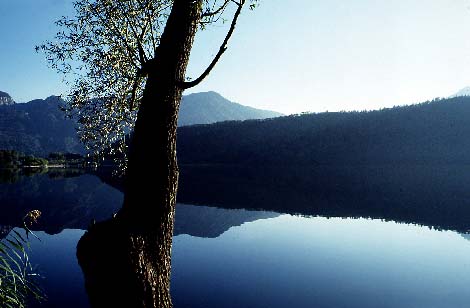
Lake in Northern Italy photographed by Derek on Ektachrome 64 and processed in home-made E6

DIY

If you really want to cut the cost of your E-6 processing, the way to do it is to mix up your own processing solutions, which is not nearly as difficult as it may sound. The only equipment you need, apart from the usual measures and mixing jugs, is an accurate chemical balance and a set of weights, which will cost you about £30.

Apart from economy, you get several other benefits from processing your own E-6 films. The first of these is speed. Even the most efficient professional lab will take at least a couple of hours to process your films. And unless it happens to be next door you have to add the time and inconvenience of taking and collecting your film. On the other hand, if you do the job yourself you can be examining the results within an hour of taking your pictures - if you have the chemicals mixed and up to temperature. This is, of course, a big advantage when you are shooting in the studio, because it means you can leave the lighting set up until you see the transparencies. It also enables you to shoot a test film to see if you need any slight filter adjustments on the camera to correct the colour balance before you shoot your final pictures.

Another benefit is that you have full control over your processing. You can, for example, up-rate or down-rate your films according to the shooting conditions and change the standard process to compensate. I know that most professional labs offer this service, but it often takes longer and they normally charge extra for it.

If you take care handling and processing your films the quality of your transparencies should be at least as good as those you get from a professional lab. Because you're doing the job yourself youÕll inevitably take more care than a lab that's set up to produce commercially acceptable results from thousands of films every day.

Finally, the great thing about processing your own reversal films is that you donÕt need a lot of equipment. Just a processing tank, an accurate thermometer and timer, a few measures and some means of keeping the temperature of the solutions constant.

EQUIPMENT

You can use any kind of processing tank, although I prefer stainless steel to plastic. Metal is a better conductor of heat, so it's easier to control the temperature. I also find stainless steel spirals far easier to load than the plastic type. For timing, you donÕt need anything more elaborate than a wristwatch with a second hand. But do buy a good certified thermometer and make sure your solutions are at the correct temperature.

For temperature control I simply use a bowl of water at a degree or so higher than the process temperature. I stand all the bottles of processing solution and the tank in it, and as the temperature of the water starts to drop I add a little more hot water to bring it back up again. Alternatively you could use a small aquarium heater and thermostat to keep the temperature of the water constant.

One final piece of equipment you'll need is a No 2 Photoflood bulb in a reflector. This is for the reversal exposure that comes part way through the process (some commercial E-6 kits do not require this). For each of the processing solutions, dissolve the chemicals in the order given in the formula. If you don't, you may find that some of the chemicals - such as the Phenidone in the first developer - will be difficult or even impossible to dissolve. Ordinary drinking water is perfectly adequate for mixing the solutions (you don't need distilled water) and the Calgon in the two developers overcomes the effects of hard water.

It is worth filtering the solutions into their storage bottles to remove particles of dust and other debris. Make sure each chemical is completely dissolved before adding the next and after you add the 0.1 per cent potassium iodide solution, rinse the measure out with some of the mixed developer.

SOLUTIONS

First developer

Sodium hexametaphosphate (Calgon)                  2.0 g
Sodium sulphite, anhydrous                        39.0 g
Potassium carbonate, anhydrous                    14.0 g
Sodium bicarbonate                                12.0 g 
Phenidone                                          0.6 g 
Hydroquinone                                       6.0 g
Sodium bromide                                     2.2 g
Sodium thiocyanate                                 1.0 g
Sodium hydroxide                                   3.3 g
Potassium iodide, 0.1 per cent solution            4.5 ml 
Water to                                           1.0 litre

Stop bath 1

Sodium acetate, anhydrous                         30.0 g 
Acetic acid, glacial                               6.0 ml 
Water to                                           1.0 litre

Colour developer

Sodium hexametaphosphate (Calgon)                  2.0 g 
Trisodium phosphate crystals                      36.0 g
Sodium hydroxide                                   3.0 g 
Sodium sulphite, anhydrous                         4.5 g 
Sodium bromide                                    0.65 g
Potassium iodide 0.1 per cent solution              30 ml 
Sodium thiocyanate                                 1.3 g 
Citrazinic acid                                   1.25 g
CD3                                               11.0 g 
Water to                                           1.0 litre

Stop bath 2

As for Stop Bath 1, but do NOT interchange them after use

Bleach

Potassium ferricyanide                            80.0 g 
Potassium bromide                                 20.0 g
Disodium phosphate, anhydrous                     12.0 g 
Acetic acid, glacial                               5.0 ml 
Water to                                           1.0 litre

Fixer

Sodium thiosulphate, crystals                    200.0 g
(or anhydrous                                    125.0 g) 
Sodium sulphite, anhydrous                         5.0 g 
Sodium metabisulphite                              0.5 g 
Water to                                           1.0 litre

Stabiliser (optional)

Formaldehyde, 40 per cent                          5.0 ml 
Wetting agent                                      1.0 ml 
Water to                                           1.0 litre

PROCESSING

Step                         Time                 Temp deg C

1st develop                  6.25 min             38+/-0.3
Stop bath 1	                 2    min             33-39
Wash                         2    min             33-39

Reversal exposure Š see note 1
2 mins each side to No 2 Photoflood at 10 inches 

Colour dev                   6    min	        38+/-1 
Stop bath 2                  2    min             33-39 
Wash                         2    min             33-39 
Bleach                       5    min             33-39 
Rinse                        0.5  min             33-39 
Fix                          5    min             33-39 
Wash                         6    min             33-39 
Stabilise                    1    min             33-39 
Dry                          See note 6

Notes

  1. The time given for the reversal exposure is based on the film being removed from the spiral. The best way to make this exposure is to pass the film back and forth through water in a white bowl for the two minutes exposure to each side. This will prevent the film becoming too hot and starting to dry out. However, do be careful not to splash the lamp with water or it may explode. If you prefer to leave the film in the spiral for this reversal exposure, place it in a white bowl of water. Give 5 minutes exposure to each end of a clear spiral or 10 minutes to each end of a white nylon or stainless steel spiral. The important thing to remember is that it is not possible to over expose the film at this stage, but easy to under expose - so err on the side of longer rather than shorter exposure.
  2. The first development time and temperature largely determine the density and colour balance of the final transparency. For this reason, itÕs important not to deviate from the recommended time and temperature.
  3. Agitation in all baths except the stabiliser is continuous for the first 15 seconds followed by two inversions of the tank every half minute after that. For the stabiliser a single inversion over and back is sufficient.
  4. The capacity of the solutions is ten 36 exposure 35mm or 120 roll films per litre. But increase the time in the first developer by 15 seconds after processing every two films.
  5. The first developer will keep for two months unused in a full, tightly stoppered dark glass bottle. Once it's been used, it will keep for four weeks. The colour developer has a life of three months unused and two months partly used. All the other solutions will keep for at least six months, unused or partly used.
  6. Drying temperature should not exceed 60 deg C (140 deg F). The film will appear milky while it's wet, but clears completely when dry.

CONCLUSION

To return to the main benefit of processing your own reversal colour films, I've worked out roughly the cost for a litre of each working solution based on a recent chemical price list I have. The total cost of a litre of all the solutions works out at a fraction over £6.50, which equates to just 65 pence (one US dollar) a film - far cheaper than £4.17 a film with the Kodak Hobby-Pac.

Useful addresses

You can buy raw chemicals and equipment such as a laboratory balance from the following British companies.
Hogg Laboratory Supplies
Sloane Street,
Birmingham B1 3BW
Tel: (+44) (0) 121 233 1972
Rayco Chemical Ltd
199 King Street
Hoyland
Barnsley S74 9LJ
Tel: (+44) (0) 1226 744594
Silverprint Ltd
12b Valentine Place,
London SE1 8QH
Tel: (+44) (0) 171 620 0844