Back to Front
Magazines and books once abounded with plans that home constructors could
use to build enlargers, lights, cameras and much more. Today, photography
is an off-the-shelf activity: you don't make equipment, you buy it. But if
you did want to make something, and that something was a background
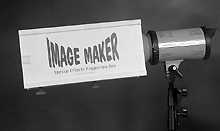
effects projector, then the result might well resemble Iris Audio Visual's
Image Maker. And lest anybody should think that this comment is meant to
belittle, let it be stated at the outset that the Image Maker is a
well-made and very capable piece of equipment. The feature that gives the
Image Maker its unique feel is the material used for its housing, wood -
the material much beloved by constructors of yesteryear.
 The Image Maker has no light source of its own, requiring a separate
flash head to be fixed to the back panel. A range of mounting plates is
offered to suit flash heads from a wide variety of manufacturers
(including Bowens, Multiblitz, Courtenay and Elinchrom). To be more exact,
the plates suit different reflector sizes, for mounting is effected with a
small spill-kill in place on whichever light is used. Such reflectors are
the appropriate manufacturers' own types and are not included with the
Image Maker. It is possible that some purchasers will have to invest in a
suitable reflector before being able to use the device.
The Image Maker has no light source of its own, requiring a separate
flash head to be fixed to the back panel. A range of mounting plates is
offered to suit flash heads from a wide variety of manufacturers
(including Bowens, Multiblitz, Courtenay and Elinchrom). To be more exact,
the plates suit different reflector sizes, for mounting is effected with a
small spill-kill in place on whichever light is used. Such reflectors are
the appropriate manufacturers' own types and are not included with the
Image Maker. It is possible that some purchasers will have to invest in a
suitable reflector before being able to use the device.
Inside the 44 x 31 x 31cm Image Maker are two movable (plastic) Fresnel
lenses. One fixes the image size while the other adjusts focus. Also
provided are slots for a (polycarbonate) heat filter and for gobos -
shadow masks that create patterns in the projected light. There is no
mounting bush under the unit: all the weight, such as it is, is borne by
the attached reflector. The literature supplied with the Image Maker
advises that a counter-weight should be added if the light becomes too
front-heavy.
Saying that the two lenses vary image size and focus might suggest that
users have full control over these two variables, but this is not the
whole story. Allied to image size and sharpness is the projector to screen
distance. It is unlikely that any purchaser using the device in a
reasonable size studio would be limited by the equipment's performance,
but photographers who work in small studios at home might not have such an
easy time. This note of caution is compounded by the fact that the
literature cites exposure values based on an 8ft projector to screen
distance. In practice, 8ft will rarely be enough to keep the subject
lighting from degrading the background's contrast. Significantly, many
example images shot using projected shadow backgrounds (including those in
the Image Maker brochure) suffer from this very problem.
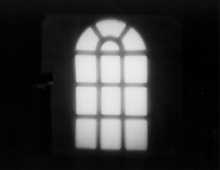
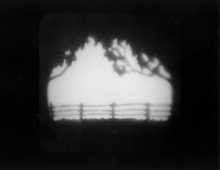
Low contrast backgrounds are not indicative of poor equipment performance
as much as of poor lighting control. As the examples here show, high
contrast shadow patterns are perfectly possible if the background is kept
free of image-degrading spill.
The Image Maker's performance is directly related to the light to which
it is attached. This is respect of both the exposures that it offers and
the quality of the image. In theory, fixing a focusing projector on the
front of a large light source (which many flash tubes are), is a bad idea.
In practice, it worked surprisingly well using a System Imaging 600 - and
the odds are that even better results might be obtained using a Multiblitz
head, or other model with a smaller diameter flash tube.
With the Systems monobloc set to 1/4 power, the exposure was around f8
to f9.5 for image circles between 84cm and 108cm at a distance of 3m.
Moving the projector back another metre (4m from the screen), and setting
a larger (140cm) image, dropped the exposure to approximately f6.3 -
varying slightly from the centre to the edge of the image circle. Turning
the Systems light up to full power boosted the exposures by two f-stops,
yielding apertures that some photographers might feel much happier with.
Why, it may be asked, was the Systems light used mostly at 1/4 power? The
answer is that the Image Maker literature states that modelling lamp
powers must not exceed 100W: turning the Systems 600 down two stops ought
to decrease the the modelling lamp (in ratio brightness mode) from 300W to
75W.
For the same reason, the modelling lamp was extinguished when performing
the full power test. Yet despite these precautions, one of the sample
gobos supplied (a mirror image perspective grid) suffered slight heat
damage at its black centre. The good news is that single gobos are very
cheap (�9.95 each). The bad news is that simple dimming of the modelling
lamp seems insufficient to prevent damage occurring.
 In fairness, the literature does suggest that powerful modelling lamps
should be changed when the Image Maker is attached. Regrettably, this is
very inconvenient: turning down the brightness would be a much better
alternative - if only it worked!
In fairness, the literature does suggest that powerful modelling lamps
should be changed when the Image Maker is attached. Regrettably, this is
very inconvenient: turning down the brightness would be a much better
alternative - if only it worked!
Aiming the Image Maker at white background paper, with no other lights
used, gave excellent contrast - as the Polaroid prints shown here confirm.
Some people might complain that the shapes are not fully sharp, but this
is no problem given that backgrounds are almost always at least slightly
soft. As has already been mentioned, retaining contrast once the
foreground subject lighting has been added is a matter of lighting skill
and the available space - topics that will be revisited in a few months'
time when I return to shadow backgrounds with a look at DHA's metal gobos
for use in flash manufacturers' own projectors.
In the meantime, the Image Maker attachment clearly does work as intended
and, at �279 (plus VAT), it costs around half as much as a complete flash
spot unit. As such, it offers an excellent starting point for anybody
wanting to explore shadow backgrounds. It also has the advantage of
crossing flash platforms, so would remain useful even after a change of
lighting system.
Return to Photon July 96 contents